- Open 'side4linux' and click on Project>Open Project in the Main Menue.
- Double click on the 'DEMOS' Product Area,
- Double click on the 'SIDEdemos' Product,
- In the file dialog double click the 'GNOMEC' folder. This takes you to where 'GNOME' visual 'C' language projects are kept.
- Double click on 'Sample', this opens the 'Sample' project
folder.
- Double click on 'sample.prf'. This opens the 'Sample' project file.
- Notice that the left bottom status bar window says 'Project: Sample' which is the Project Name.
- Notice that the next window says 'Ptype: GNOMEC' which is the Project Type.
- Try clicking on 'Project' on the Main Menue, you will notice that 'Close Project' is now active.
- Click on the 'Open' toolbar button, observe the seven files available.
- Now click on Project>Save Project As and save the 'Sample' Project as 'Test1'.
- Close the current Project by clicking on Project>Close Project.
- As in Step 1 open your 'Test1' project.
- Notice that project names are set to be an upper case
letter followed by lower case letters (easier on the IDE's Project
management routines).
- After opening your 'Test1' Project as up to the end of
Step 8 you can now double click on 'main.c' to open it into the IDE
Notebook.
- Notice that the 'Save' and 'Save All' buttons are now active.
- Notice the highlighted file text in the tabbed file 'Notebook'.
- Click on the 'Open' toolbar button again and open the two files 'callbacks.c' and 'interface.c' also.
- Notice that by clicking on the 'tabs' you can change from one file to another.
- Keep in mind that these are only copies of the files on disk, if you make changes then you must 'Save' them.
- Now click on Build>Autogen Project followed after that is finished by the 'Build' button and you should see something like that in the following screenshot,
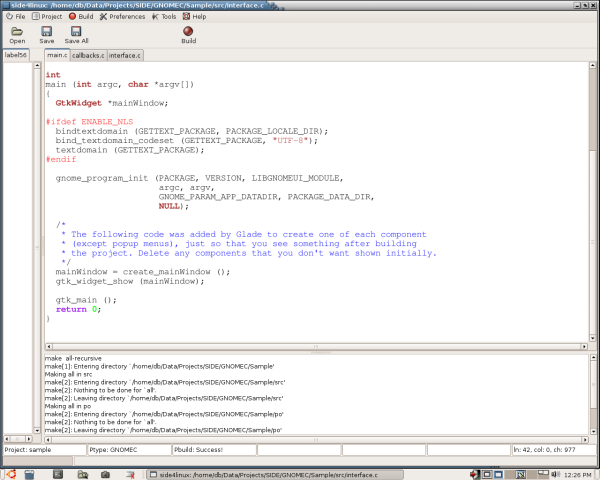
From the screenshot above you can see that the 'Output window' has the output from the 'C' compiler and the
'Status bar' says 'Build Success' !
Now let us make some visual as follows,
From the Main Menue click on Project>Edit Project>Edit Project Visuals with Glade and once the visuals editor 'Glade2' has launched we should have something like the following screenshot,
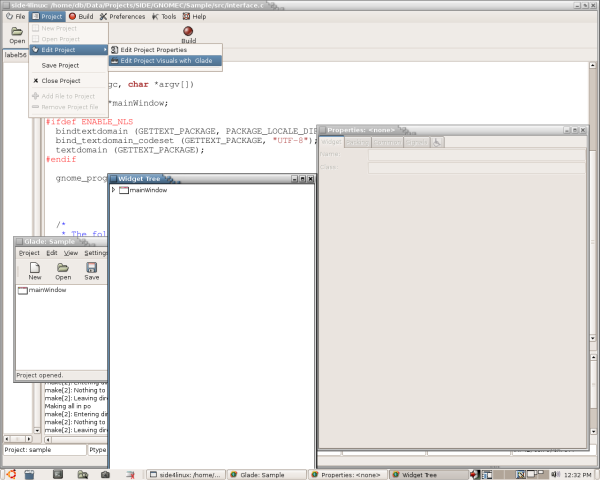
Now Glade2 is a separate program that was included when you setup your GNOME build environment, you did do this yes? If not then re-read
'setup GNOME build environment.txt'.
We will now look at what the sample project has currently provided. Firstly change to another workspace using the workspace switcher on your taskbar.
Open 'Nautilus' and change to the '--SIDE/GNOMEC/Sample/src' directory, click on 'sample' to run the locally compiled visual binary program we have just 'Built'.
Expand it to full screen size and it should look like this,
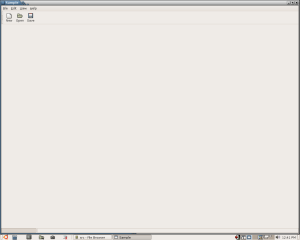
Try hovering the mouse pointer over the toolbar buttons and read the 'Tool tips' provided, try also to click on the Main Menue items to see what they do. Nothing! Before asking for a full refund on 'side4linux' ( no good as it is provided for free!! ) it should be noted that there is some work to do before the 'visuals' can actually 'do' anything! Now close the program as we have work to do!.
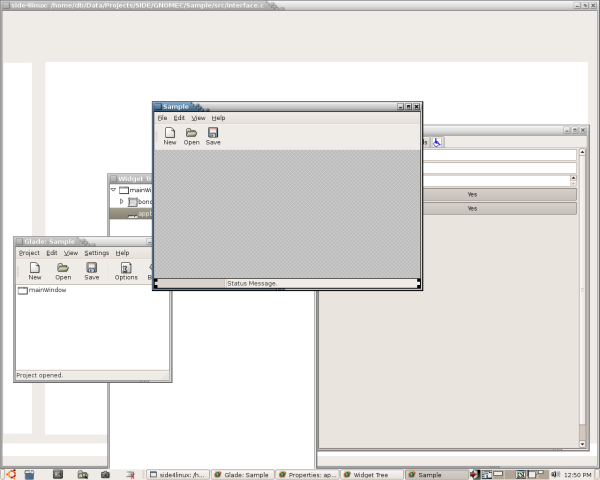
Return to the workspace where 'side4linux' is running with Glade2 active and double click on 'Main Window' in the 'GLADE' window. This should open visual that looks like the program we just ran as follows ( at least after it has been dragged bigger by the mouse ),
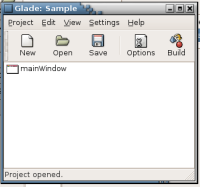
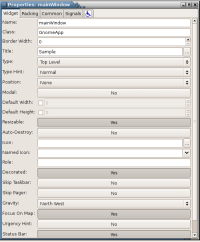
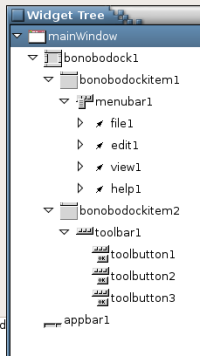
Perhaps now is a good time to explain the windows that you will use in Glade-2, they will be called 'GLADE', 'PALETTE', 'PROPERTIES' and 'WIDGET TREE' windows as follows,
 |
 |
| Glade Window | Glade Properties Window |
 |
 |
| Glade Palette Window | Glade Widget Tree Window |
Now we will add some more visual items namely two push buttons and a text entry because our brief is to make the 'Hello World!' message appear and then dis-appear. To do this we must place some 'container' boxes to hold out parts ( we will now use their correct name 'widget' from now on ). So to begin we need a container widget with two placeholders.
From the 'GLADE' window click on View>Show Palette if not already visible. Now click on GTK+ Basic in the 'PALETTE' window and then click on the 'Vertical Box' icon three rows up from the bottom. This 'picks up' a single vertical box widget which we can now transfer to the 'MainWindow' by clicking in the middle of the 'cross hatched' area. On doing this a little box appears titled 'New Vertical Box'. Set the 'number of rows' to two and click 'OK' in the 'PROPERTIES' window. Our 'crossed hatch area' now has a thin white horizontal line across it. Now go back to the 'PALETTE' and pick up an 'horizontal box widget' and place it into the lower 'vertical box widget' with the 'Number of columns' set to two, again in the 'PROPERTIES' window. We now have three place holders, one taking up half the available area and the lower area divided into two. Now pick up a 'button' widget from the 'PALETTE' and place it into the left lower placeholder. Make sure you pick a 'button' and not a 'toolbar button', it should be four rows down from the top and in the first column position. Do this again to place a 'button' widget into the lower right placeholder. The result should look like the following,
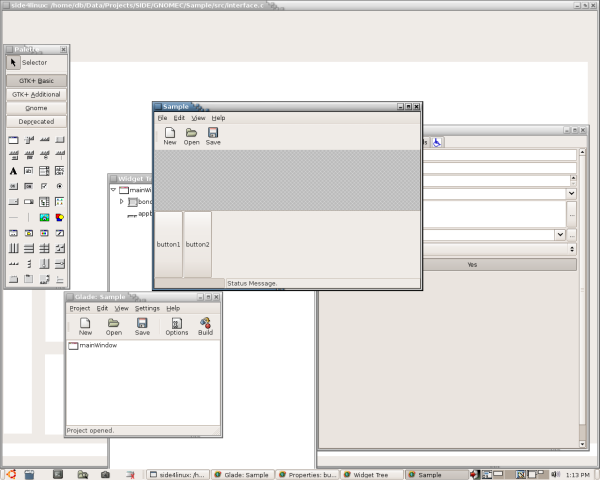
You can now add a multi line 'text view' widget to the top placeholder ( three rows down and the last column in line in the 'PALETTE'.)
That just about completes our visual layout for the new program but we will alter the names of the buttons from 'button1' and 'button2' to 'Hello' and 'Erase' as follows,
Drag the 'MainWindow' window down to the left and the 'PROPERTIES' window up and to the right so that both boxes are clear of each other. Now click on the bottom corner of 'button1' and in the 'PROPERTIES' window change the 'Name' to 'HELLObutton' and the 'Label' to 'Hello'.
Click on View>Show Widget Tree in the 'GLADE' window if the Widget Tree is not yet visible and now click on the 'Hello' button in your 'MainWindow' to see where the widget fits in the 'WIDGET TREE' window.
Repeat the above for 'button2' and set the 'Name' to 'ERASEbutton' and 'Label' to 'Erase' in the 'PROPERTIES' window. If you have gotten this far then you have done well! This next screenshot should look like yours!
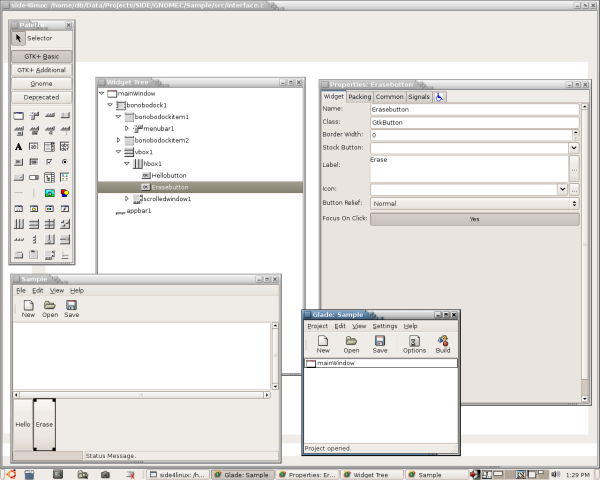
Try building the visuals by clicking on 'Build' in the 'GLADE' window. (Do not worry if Glade then crashes, it does every so often, but that does not seem to matter!) If all is well then close Glade by clicking on the 'X' in the top right hand corner which will return you to the IDE.
Notice that the files 'callbacks.c' and 'interface.c' are no longer open (opened in Step-16). You should have closed them before calling Glade but the IDE has done it for you.
Go and try your new visuals after you have rebuilt the code with a click on 'Build' in the IDE ( You 'build' twice! Once for the visuals in Glade2 and once for the 'C' compiler in the side4linux IDE).
Click on Project>Close Project from the Main Menue and now close down the IDE by clicking the 'X' in the top right corner.
Even now we still only have some visuals that 'work' but do nothing, but I need a break for some caffeine!
So we will continue this in Demo-2 !!!!!
We will provide other demos as 'side4linux' develops to cover GNOME visual programming and integration into a real world machine controller.
GUI interface made with Gtk and Glade
