Step-1: Open the Hello Project.
As a first step, connect up all the cables as used in Practical-9 and switch the computer on and then switch the power supply on. Your computer should be still operating normally!
Set your preferences to the Serial port you have used, either '0' for the first serial port or '1' for the second with 'Preferences>IDE>Basic>ComPort'
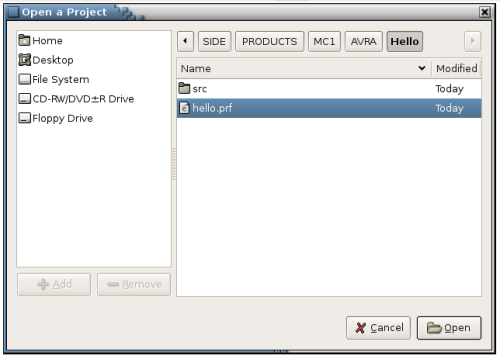
Bring up the side4linux IDE on your computer and open the test project's 'hello.prf' file, /SIDE/PRODUCTS/MC1/AVRA/Hello/hello.prf using 'Project>Open Project' from the Main Menu as follows,

Fig-1 Open Hello Project Dialog
OK, now that you have programmed your MC-1 CPU with the 'Hello' program ( Demo-9 ) you can now open the 'b2term' program to communicate with your AVR chip!
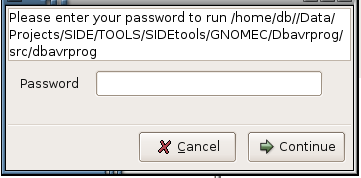
Launch the serial graphical communication program as 'Tools>AVRA>AVR MONITOR', you should be greeted by 'sudo's' password dialog similar to the graphic below,

As a first step, connect up all the cables as used in Practical-9 and switch the computer on and then switch the power supply on. Your computer should be still operating normally!
Set your preferences to the Serial port you have used, either '0' for the first serial port or '1' for the second with 'Preferences>IDE>Basic>ComPort'
Bring up the side4linux IDE on your computer and open the test project's 'hello.prf' file, /SIDE/PRODUCTS/MC1/AVRA/Hello/hello.prf using 'Project>Open Project' from the Main Menu as follows,

Fig-1 Open Hello Project Dialog
OK, now that you have programmed your MC-1 CPU with the 'Hello' program ( Demo-9 ) you can now open the 'b2term' program to communicate with your AVR chip!
Launch the serial graphical communication program as 'Tools>AVRA>AVR MONITOR', you should be greeted by 'sudo's' password dialog similar to the graphic below,

Fig-2 Sudo Dialog Box.
After
using your normal password that you signed on with and on clicking the
Continue' button you should now have the 'b2term' screen up on your
display. If you cannot sign on then perhaps you need to re-read this section
on setting Linux user permissions.
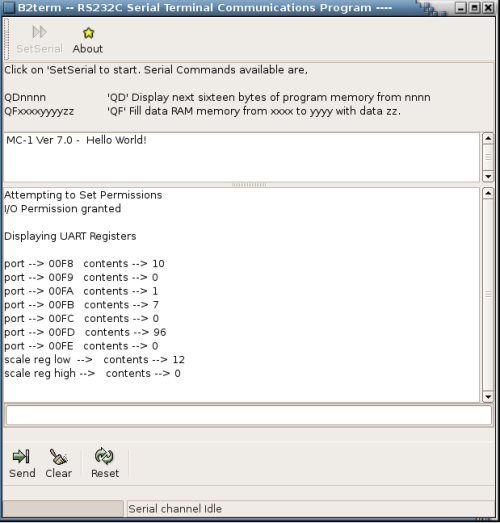
Now to set up access to your serial port, click on the 'SetSerial' button and you should be greeted with the message as follows,

Fig-3 b2term sign on screen.
Notice that there are three windows,
Notice also that there are three buttons at the bottom,
Now to set up access to your serial port, click on the 'SetSerial' button and you should be greeted with the message as follows,

Fig-3 b2term sign on screen.
Notice that there are three windows,
- Input messages from the MC-1 CPU.
- Output messages from the 'b2term' program.
- User command entry box for special commands to send to the MC-1 CPU
Notice also that there are three buttons at the bottom,
- Send command currently in the entry box ( Window-3 ).
- Clear the entry box.
- Send the 'reset' command to the MC-1 CPU.